Modeling Complex Hillside Projects in Archicad: Clear Creek Tahoe Residence
During the Archicad User Group session in January hosted by LearnVirtual, Stephen Elbert of Elbert Architecture used the Clear Creek Tahoe Residence as a deep dive into advanced 3D modeling—from early site integration through construction documentation. Through this complex hillside home, he demonstrated how Archicad’s integrated modeling tools support both design exploration and highly precise technical coordination—without duplicating work.
The session underscored a powerful idea: when 3D workflows are intentional from the start, clarity, accuracy, and efficiency carry through the entire project lifecycle.
Why 3D Modeling Matters on Challenging Sites
The Clear Creek Tahoe Residence is a 4,000-square-foot home set on a steep downslope lot in Nevada at approximately 5,500 feet elevation. The site required:
-
Multiple elevation transitions
-
Partial two-story conditions
-
Strategic cut-and-fill grading
-
Fire department–compliant driveway slopes
-
Careful structural integration into the terrain
Rather than separating grading, structure, and layout into disconnected tasks, the team resolved them directly within the 3D model—eliminating conflicts before construction began.
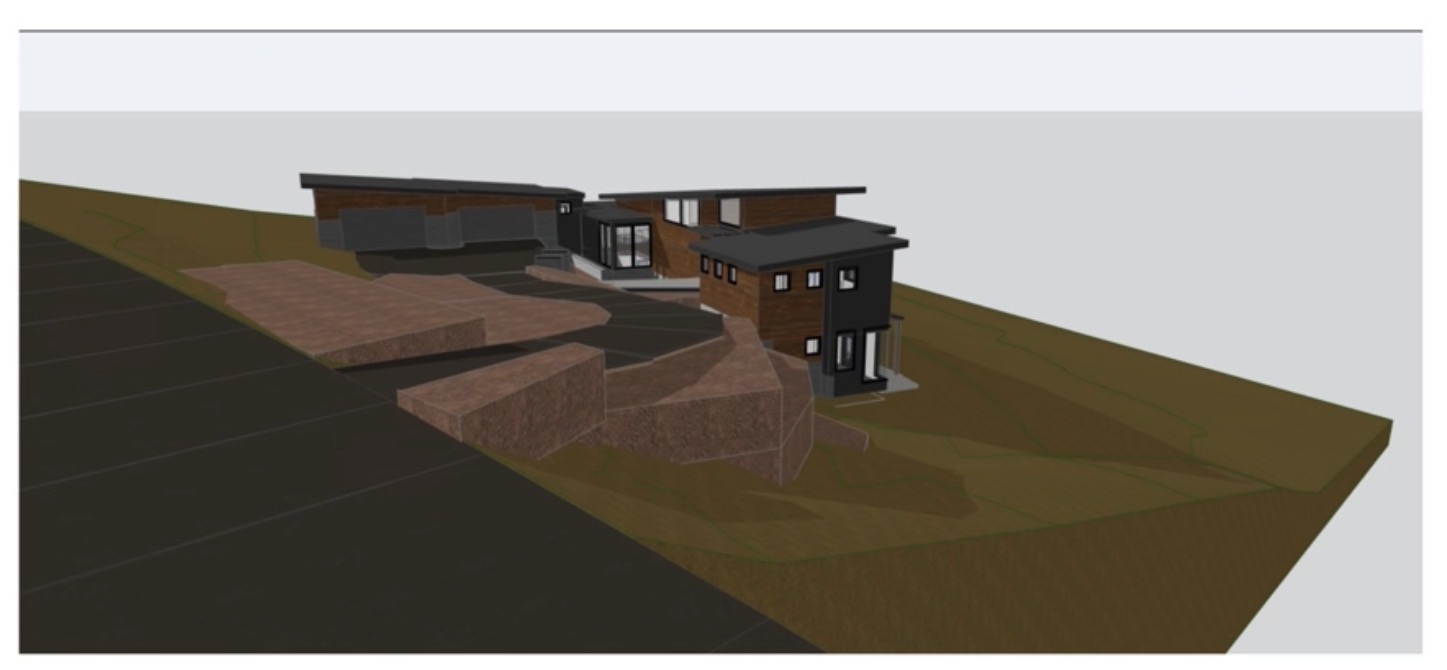
To study slope and access requirements, Stephen modeled the driveway as a series of slabs, allowing for quick adjustments as elevations evolved. Earth fill was modeled separately from the existing topography, making cut-and-fill relationships visually clear and ensuring proper drainage coordination early in design.
The foundation system required complex footings and retaining walls across multiple elevations. By modeling directly from the structural engineer’s specifications, the team could verify structural alignment with site conditions while improving communication with both client and contractor.
From Design to Construction: Precision Without Duplication
One of the session’s most compelling moments showed how a well-built 3D model eliminates the need to recreate information for fabrication.
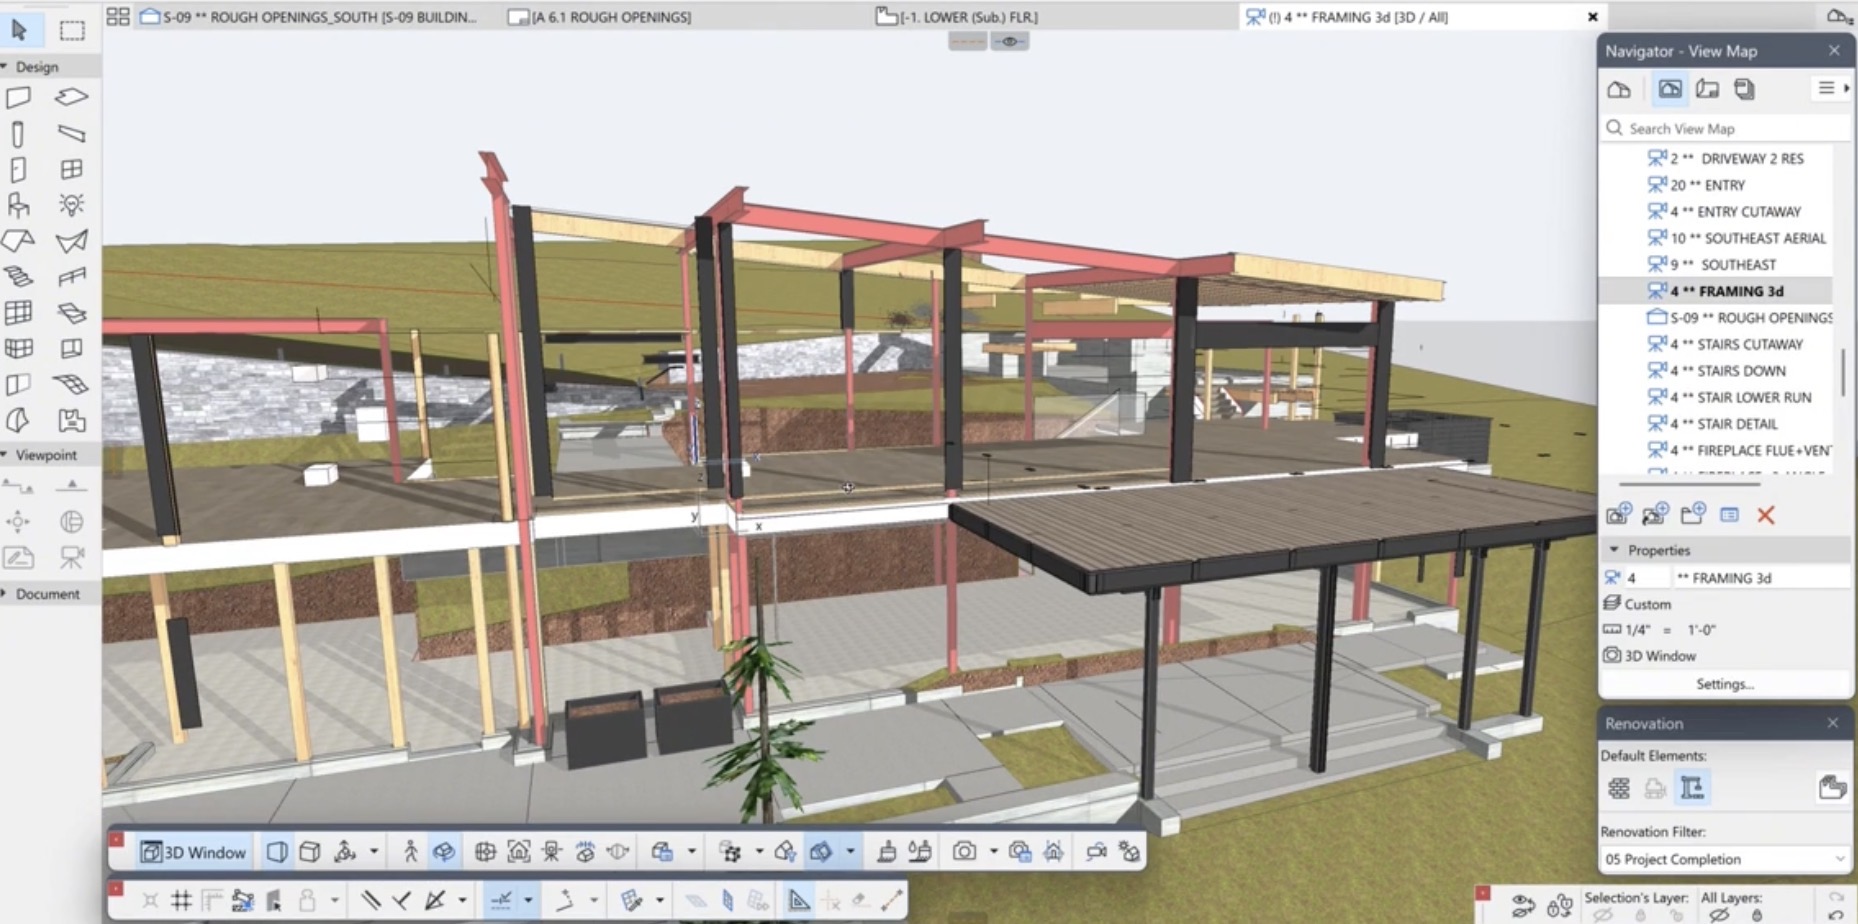
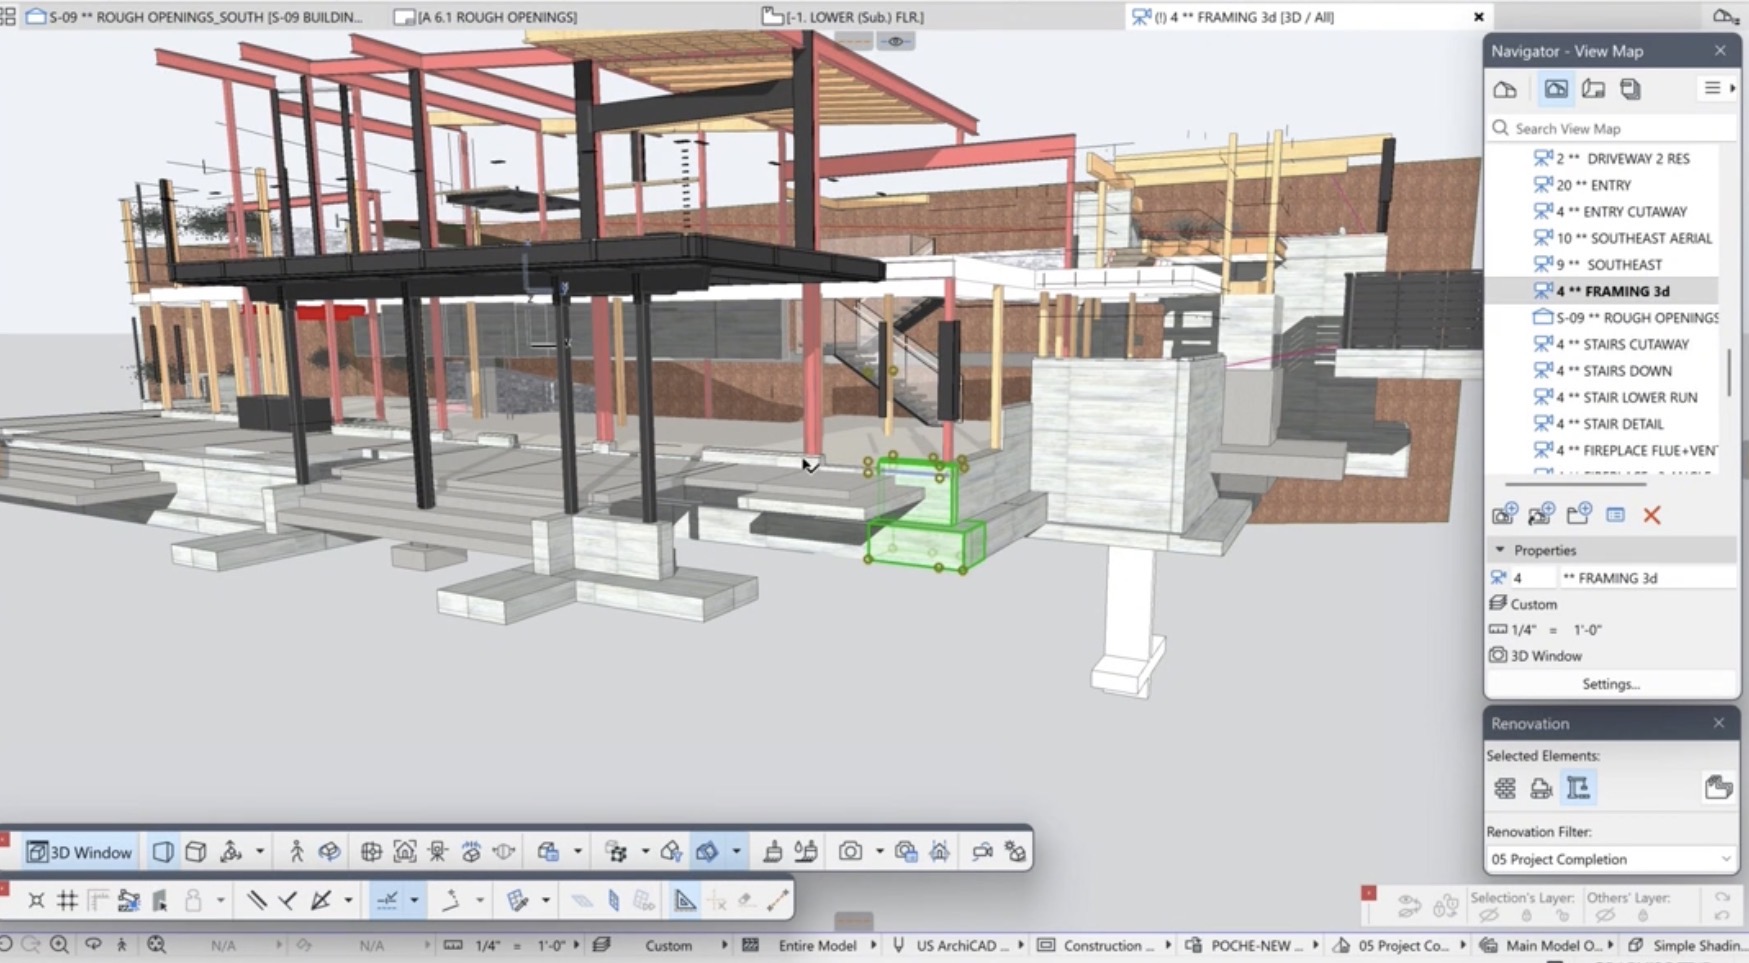
The south-facing elevation includes custom trapezoidal windows above standard rectangular units. Typically, these windows require field measurements after framing—delaying fabrication. The project timeline did not allow for that step.
Instead, Stephen modeled the full structural framing system—steel beams, TJIs, cross-blocking, and nailers—directly from engineering drawings. From that coordinated model, he extracted rough opening dimensions accurate to 1/32 of an inch. The trapezoidal windows were ordered, fabricated, and installed successfully—demonstrating the power of precise, intentional modeling.
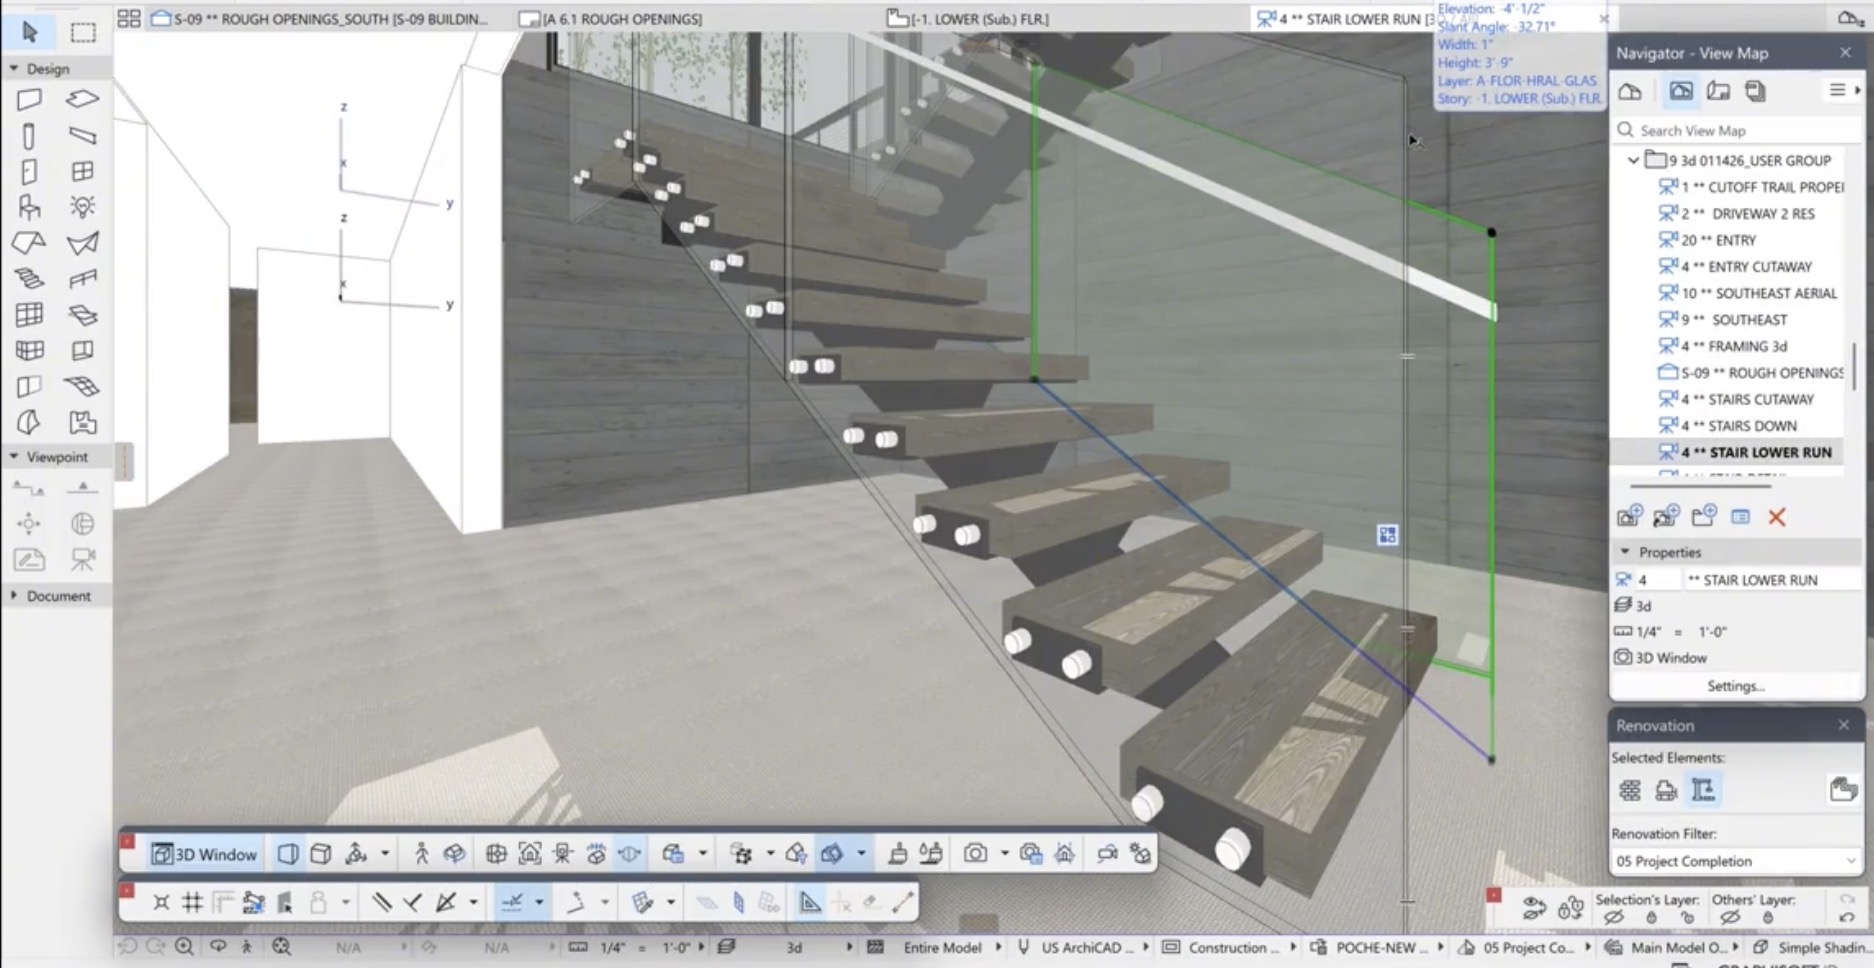
The interior stair presented another design challenge. The client requested 3.5-inch solid wood treads supported by steel U-shaped plates, with glass railings on both sides.
Stephen constructed the stair treads as individual modeled components—wood, steel plates, and aluminum anchor caps—then saved them as reusable elements through the Library Manager. For the glass railings, he modeled beams instead of using the standard railing tool, allowing more precise control over angles and placement.
This approach allowed the team to:
-
Clearly communicate design intent
-
Verify code compliance (including the 4-inch sphere test)
-
Deliver fabrication-ready documentation
All from the same coordinated model—model once, use everywhere.
Watch the Full Session
This recap only scratches the surface. The full recording includes live demonstrations, real project workflows, and audience Q&A that bring these techniques to life.
👉 Watch the full Archicad User Group session on LearnVirtual
To see demonstrations, examples, and full explanations, join the LearnVirtual community or log in to your LearnVirtual account. User Group recordings are available to User Group Plus, Basic, and Premium LearnVirtual members.